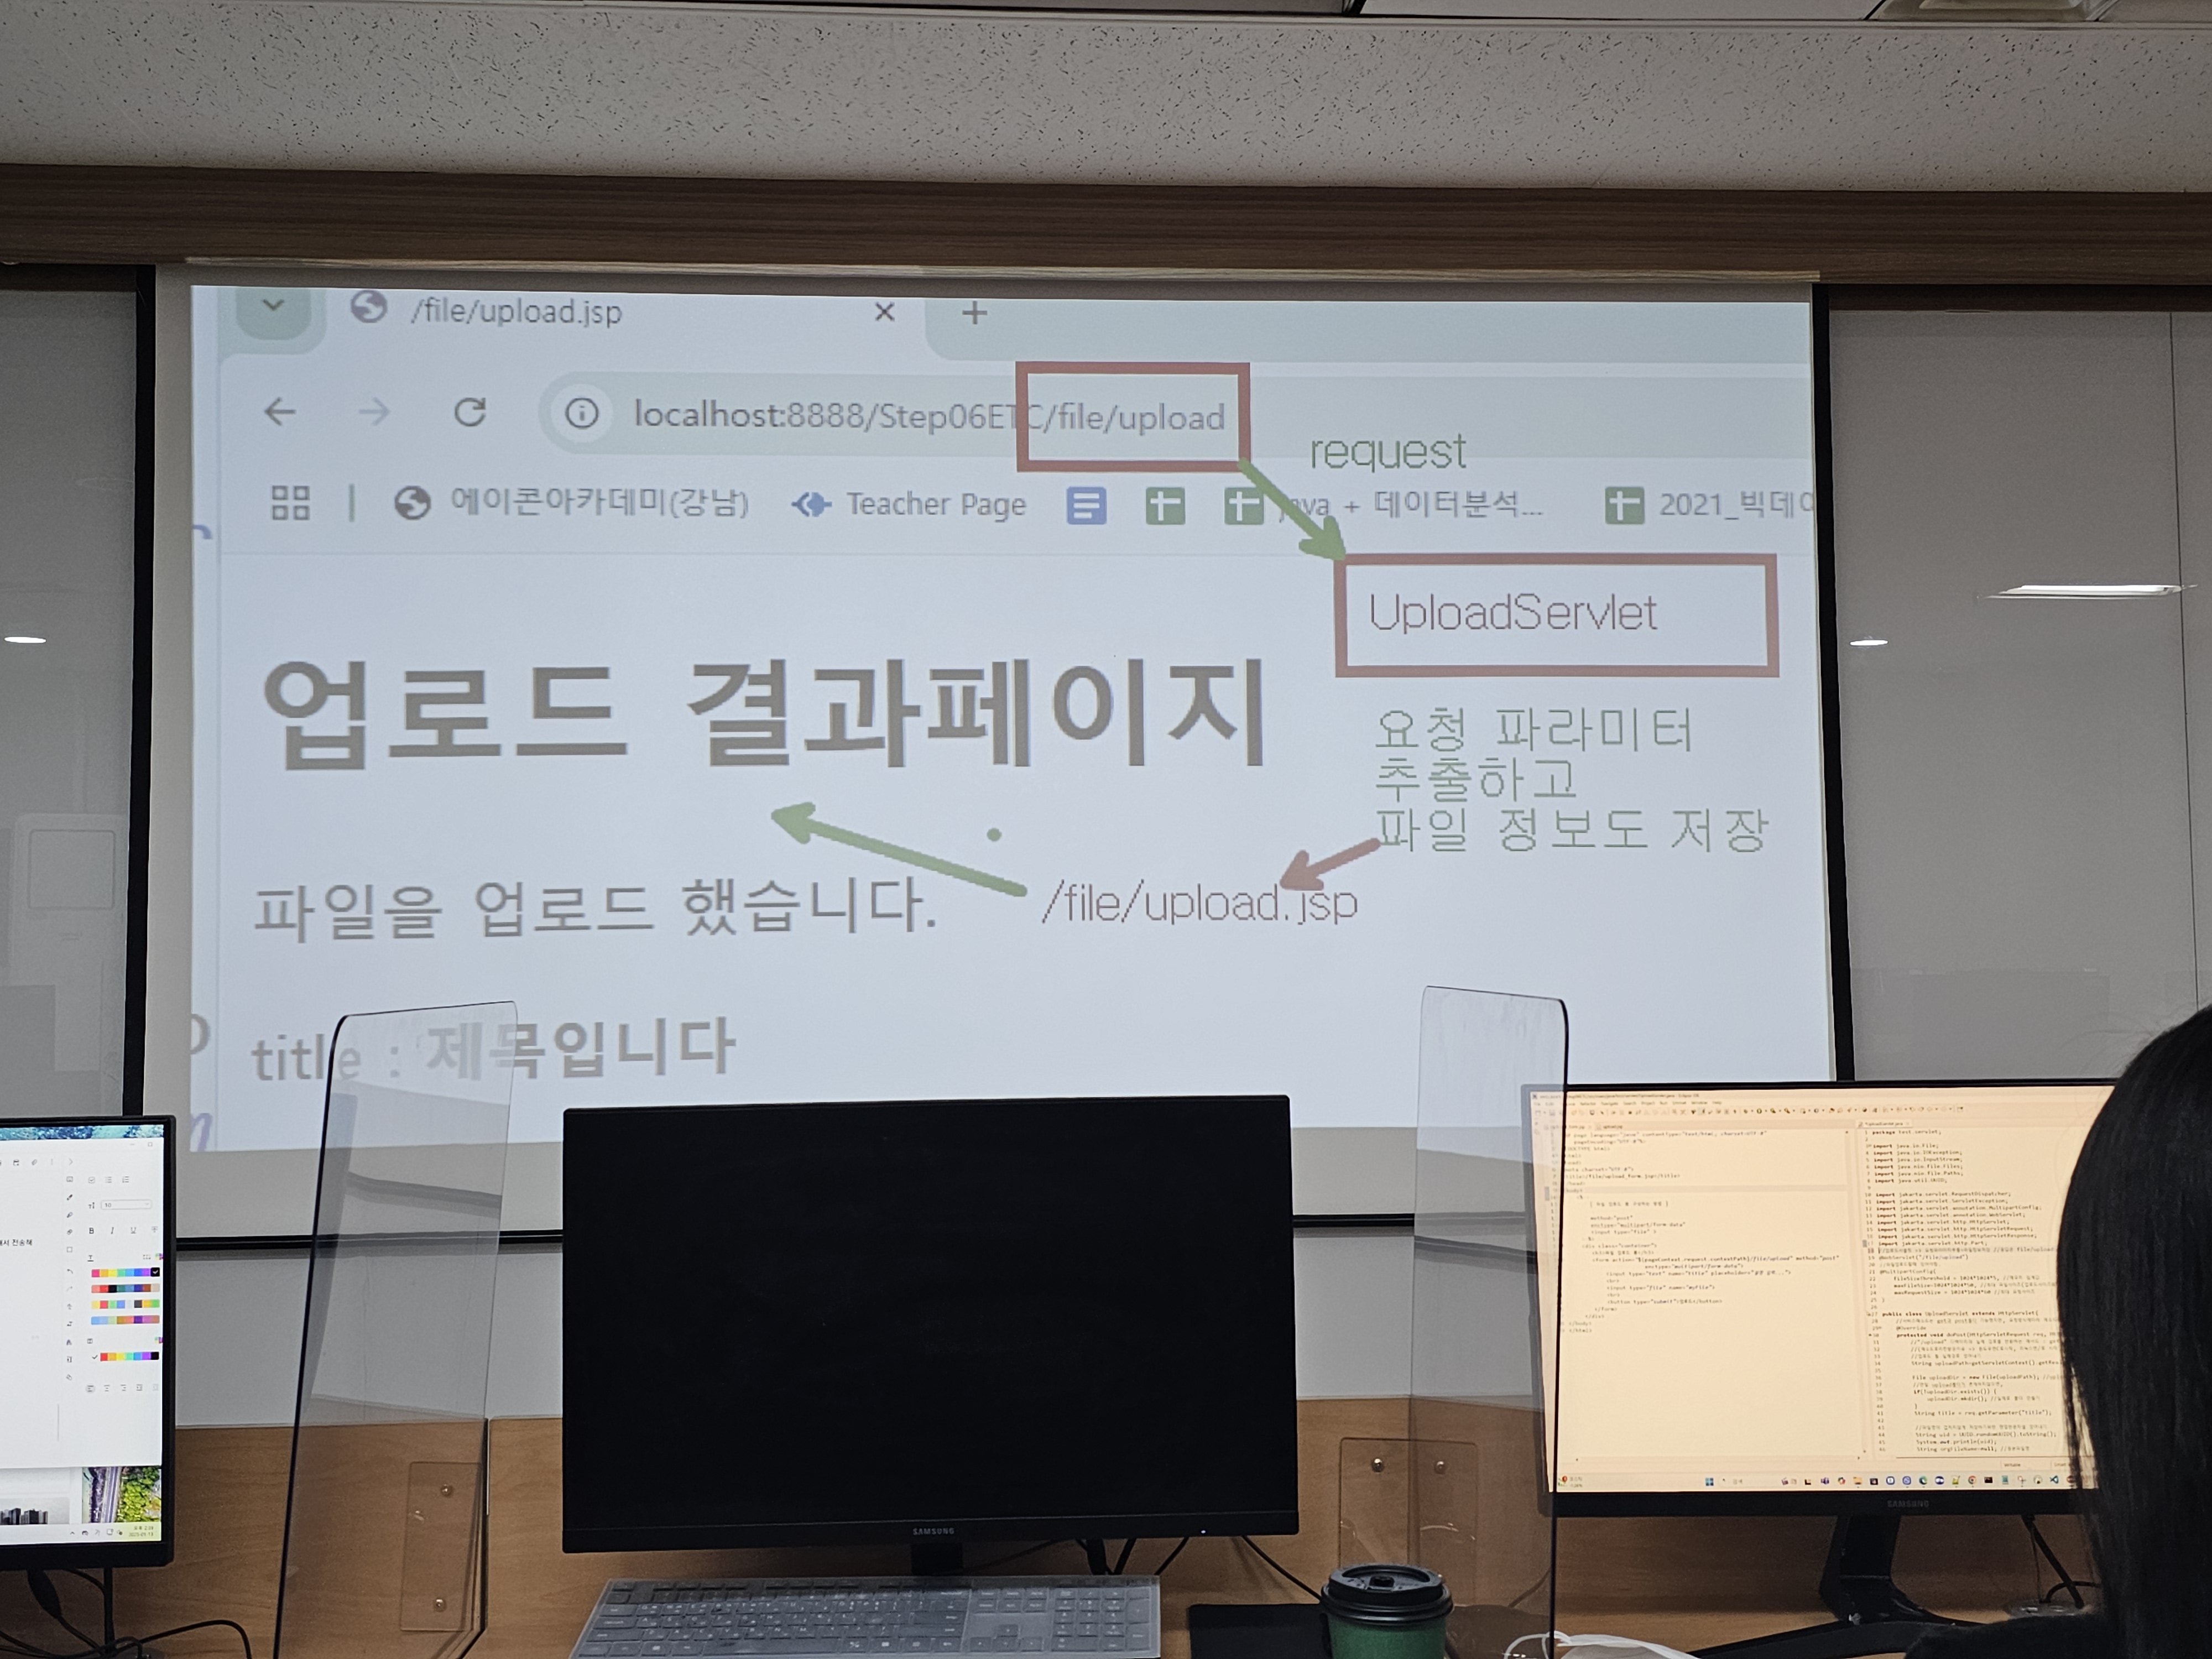
<14:30 5교시>


다운로드 기능 넣어보기
package test.servlet;

import java.io.BufferedOutputStream;
import java.io.File;
import java.io.FileInputStream;
import java.io.IOException;
import java.net.URLEncoder;

import jakarta.servlet.ServletException;
import jakarta.servlet.annotation.WebServlet;
import jakarta.servlet.http.HttpServlet;
import jakarta.servlet.http.HttpServletRequest;
import jakarta.servlet.http.HttpServletResponse;

@WebServlet("/file/download")
public class FileDownServlet extends HttpServlet{
	@Override
	protected void service(HttpServletRequest request, HttpServletResponse response) throws ServletException, IOException {
		//다운로드 작업에 필요한 3가지 정보(원본파일명, 저장된파일명, 파일의크기) 얻어오기
		// 지금은 파라미터로 전달되지만 실제로는 DB에 저장된 정보를 읽어와서 다운로드 해야 함
		String origFileName=request.getParameter("origFileName");
		String saveFileName=request.getParameter("saveFileName");
		long fileSize=Long.parseLong(request.getParameter("fileSize"));

		//응답 헤더 정보 설정
		response.setHeader("Content-Type", "application/octet-stream; charset=UTF-8");
		//다운로드 시켜줄 파일명 인코딩
	   	String encodedName=URLEncoder.encode(origFileName, "utf-8");
		//파일명에 공백이있는 경우 처리
		encodedName=encodedName.replaceAll("\\+"," ");

		response.setHeader("Content-Disposition", "attachment;filename="+encodedName);
		response.setHeader("Content-Transfer-Encoding", "binary");

		//다운로드할 파일의 크기
		response.setContentLengthLong(fileSize);

		//다운로드 시켜줄 파일의 실제 경로
		String path=getServletContext().getRealPath("/upload")+File.separator+saveFileName;

		FileInputStream fis=null;
		BufferedOutputStream bos=null;
		try {
			//파일에서 byte 을 읽어들일 객체
			fis=new FileInputStream(path);
			//클라이언트에게 출력할수 있는 스트림 객체 얻어오기
			bos=new BufferedOutputStream(response.getOutputStream());
			//한번에 최대 1M byte 씩 읽어올수 있는 버퍼
		   	byte[] buffer=new byte[1024*1024];
		   	int readedByte=0;
		   	//반복문 돌면서 출력해주기
		   	while(true) {
		   		//byte[] 객체를 이용해서 파일에서 byte 알갱이 읽어오기
		   		readedByte = fis.read(buffer);
		   		if(readedByte == -1)break; //더이상 읽을 데이터가 없다면 반복문 빠져 나오기
		   		//읽은 만큼 출력하기
		   		bos.write(buffer, 0, readedByte);
		   		bos.flush(); //출력
		   	}
		}catch(Exception e) {
			e.printStackTrace();
		}finally {
			if(fis!=null)fis.close();
			if(bos!=null)bos.close();
		}
	}
}
Ctrl + Shift + O 를 누르면 일괄 import 가능하다

<15:30 6교시>
Step06ETC/upload/saveFileName 형태의 경로를 알아두자.
upload_form2.jsp
<%@ page language="java" contentType="text/html; charset=UTF-8"
    pageEncoding="UTF-8"%>
<!DOCTYPE html>
<html>
<head>
<meta charset="UTF-8">
<title>Insert title here</title>
</head>
<body>
	<div class="container">
		<h3>이미지업로드 폼</h3>
		<form action="${pageContext.request.contextPath}/file/upload2" method="post" enctype="multipart/form-data">
			<input type="text" name="title" placeholder="설명입력"/><br />
			이미지 <input type="file" name="myImg" accept="image/*" /><br />
			<button type="submit"> 업로드 </button>
		</form>

	</div>
</body>
</html>
UploadServlet2.java
package test.servlet;

import java.io.File;
import java.io.IOException;
import java.io.InputStream;
import java.nio.file.Files;
import java.nio.file.Paths;
import java.util.UUID;

import jakarta.servlet.RequestDispatcher;
import jakarta.servlet.ServletException;
import jakarta.servlet.annotation.MultipartConfig;
import jakarta.servlet.annotation.WebServlet;
import jakarta.servlet.http.HttpServlet;
import jakarta.servlet.http.HttpServletRequest;
import jakarta.servlet.http.HttpServletResponse;
import jakarta.servlet.http.Part;
@WebServlet("/file/upload2")
@MultipartConfig(
		fileSizeThreshold = 1024*1024*5,//메모리 임계값 (메모리를 효율적으로 쓰기 위한 값, 이 값을 넘어가면 파일로 전환함)
		maxFileSize=1024*1024*50, //최대 파일 사이즈 1킬로바이트(=1024바이트)*1킬로바이트*50 =50메가 바이트
		maxRequestSize=1024*1024*60//최대 요청 사이즈
		)
public class UploadServlet2 extends HttpServlet{
	@Override
	protected void doPost(HttpServletRequest req, HttpServletResponse resp) throws ServletException, IOException {
		//업로드될 실제 경로 얻어내기
		String uploadPath=getServletContext().getRealPath("/upload");
		File uploadDir=new File(uploadPath);
		//만일 upload 폴더가 존재하지 않으면
		if(!uploadDir.exists()) {
			uploadDir.mkdir();//실제로 폴더 만들기
		}

		String title=req.getParameter("title");

		//파일명이 겹치지 않게 저장하기 위한 랜덤한 문자열을 얻어내기
		String uid=UUID.randomUUID().toString();
		System.out.println(uid);
		String origFileName=null;
		String saveFileName=null;

		//파일 데이터 처리는 좀 다르다
		Part filePart = req.getPart("myImg");
		if(filePart !=null) {
			//파일 이름 얻어내기
			origFileName=filePart.getSubmittedFileName();
			//저장될 파일의 이름 구성하기
			saveFileName=uid+origFileName;
			//저장할 파일의 경로 구성
			String filePath=uploadPath+File.separator+ saveFileName;
			//파일 저장
			InputStream is=filePart.getInputStream();
			Files.copy(is, Paths.get(filePath));
		}

		//파일의 크기 얻어내기(큰 정수이기 때문에 long type 사용)
		long fileSize=filePart.getSize();

		//응답에 필요한 데이터를 request 영역에 담기
		req.setAttribute("title", title);
		req.setAttribute("origFileName", origFileName);
		req.setAttribute("saveFileName",saveFileName );
		req.setAttribute("fileSize", fileSize);
		req.setAttribute("uploadPath", uploadPath);
		//나중에 이걸 리눅스에 올릴 때 uploadPath 확인할 필요가 있어서

		//jsp 페이지로 응답을 위임하기(리다이렉트는 컨텍스트 경로가 필요하지만 포워드 이동은 필요 없다)
		RequestDispatcher rd=req.getRequestDispatcher("/file/upload2.jsp");
		rd.forward(req, resp);
	}

}
upload2.jsp
<%@ page language="java" contentType="text/html; charset=UTF-8"
    pageEncoding="UTF-8"%>
<!DOCTYPE html>
<html>
<head>
<meta charset="UTF-8">
<title>Insert title here</title>
</head>
<body>
	<div class="container">
		<h1>업로드 결과 페이지</h1>
		<p>파일을 업로드했습니다.</p>
		<p>title : <strong> ${requestScope.title }</strong></p>
		<p>origFileName: <strong>${origFileName}</strong></p>
		<p>saveFileName: <strong>${saveFileName}</strong></p>
		<p>fileSize : <strong>${fileSize}</strong></p>
		<p>uploadPah: <strong>${uploadPath}</strong></p>
		<p><a href="${pageContext.request.contextPath}/file/download?origFileName=${origFileName}&saveFileName=${saveFileName}&fileSize=${fileSize}">다운로드</a></p>
		<img src="${pageContext.request.contextPath}/upload/${saveFileName}" alt="업로드된 이미지" />
	</div>
</body>
</html>
오브젝트 작성법을 잘 해야 자바스크립트를 잘 한다.
UploadServlet3.java
package test.servlet;

import java.io.File;
import java.io.IOException;
import java.io.InputStream;
import java.nio.file.Files;
import java.nio.file.Paths;
import java.util.UUID;

import jakarta.servlet.RequestDispatcher;
import jakarta.servlet.ServletException;
import jakarta.servlet.annotation.MultipartConfig;
import jakarta.servlet.annotation.WebServlet;
import jakarta.servlet.http.HttpServlet;
import jakarta.servlet.http.HttpServletRequest;
import jakarta.servlet.http.HttpServletResponse;
import jakarta.servlet.http.Part;
@WebServlet("/file/upload3")
@MultipartConfig(
		fileSizeThreshold = 1024*1024*5,//메모리 임계값 (메모리를 효율적으로 쓰기 위한 값, 이 값을 넘어가면 파일로 전환함)
		maxFileSize=1024*1024*50, //최대 파일 사이즈 1킬로바이트(=1024바이트)*1킬로바이트*50 =50메가 바이트
		maxRequestSize=1024*1024*60//최대 요청 사이즈
		)
public class UploadServlet3 extends HttpServlet{
	@Override
	protected void doPost(HttpServletRequest req, HttpServletResponse resp) throws ServletException, IOException {
		//업로드될 실제 경로 얻어내기
		String uploadPath=getServletContext().getRealPath("/upload");
		File uploadDir=new File(uploadPath);
		//만일 upload 폴더가 존재하지 않으면
		if(!uploadDir.exists()) {
			uploadDir.mkdir();//실제로 폴더 만들기
		}

		String title=req.getParameter("title");

		//파일명이 겹치지 않게 저장하기 위한 랜덤한 문자열을 얻어내기
		String uid=UUID.randomUUID().toString();
		System.out.println(uid);
		String origFileName=null;
		String saveFileName=null;

		//파일 데이터 처리는 좀 다르다
		Part filePart = req.getPart("myImg");
		if(filePart !=null) {
			//파일 이름 얻어내기
			origFileName=filePart.getSubmittedFileName();
			//저장될 파일의 이름 구성하기
			saveFileName=uid+origFileName;
			//저장할 파일의 경로 구성
			String filePath=uploadPath+File.separator+ saveFileName;
			//파일 저장
			InputStream is=filePart.getInputStream();
			Files.copy(is, Paths.get(filePath));
		}

		//파일의 크기 얻어내기(큰 정수이기 때문에 long type 사용)
		long fileSize=filePart.getSize();

		//응답에 필요한 데이터를 request 영역에 담기
		req.setAttribute("title", title);
		req.setAttribute("origFileName", origFileName);
		req.setAttribute("saveFileName",saveFileName );
		req.setAttribute("fileSize", fileSize);
		req.setAttribute("uploadPath", uploadPath);
		//나중에 이걸 리눅스에 올릴 때 uploadPath 확인할 필요가 있어서

		//jsp 페이지로 응답을 위임하기(리다이렉트는 컨텍스트 경로가 필요하지만 포워드 이동은 필요 없다)
		RequestDispatcher rd=req.getRequestDispatcher("/file/upload3.jsp");
		rd.forward(req, resp);
	}

}
upload3.jsp
<%@ page language="java" contentType="application/json; charset=UTF-8"
    pageEncoding="UTF-8"%>
{
	"title":"${title}",
	"origFileName":"${origFileName}",
	"saveFileName":"${saveFileName}",
	"fileSize":${fileSize}
}
<16:30 7교시>
index.jsp
<%@ page language="java" contentType="text/html; charset=UTF-8"
    pageEncoding="UTF-8"%>
<!DOCTYPE html>
<html>
<head>
<meta charset="UTF-8">
<title>Insert title here</title>
</head>
<body>
	<div class="container">
		<h1>인덱스 페이지</h1>
		<ul>
			<li><a href="test_cookie/cookie_form.jsp">쿠키 테스트</a></li>
			<li><a href="file/upload_form.jsp">파일 업로드 테스트</a></li>
			<li><a href="file/upload_form2.jsp">이미지 업로드 테스트</a></li>
			<li><a href="file/upload_form3.jsp">페이지 전환 없이 이미지 업로드 테스트</a></li>
			<li><a href="file/upload_form4.jsp">이미지 단독 업로드</a></li>
		</ul>
	</div>
</body>
</html>
upload_form3.jsp
<%@ page language="java" contentType="text/html; charset=UTF-8"
    pageEncoding="UTF-8"%>
<!DOCTYPE html>
<html>
<head>
<meta charset="UTF-8">
<title>Insert title here</title>
</head>
<body>
		<div class="container">
		<h3>이미지 업로드 폼</h3>
		<form action="${pageContext.request.contextPath}/file/upload3" method="post" enctype="multipart/form-data" id="myForm">
			<input type="text" name="title" placeholder="설명 입력"/><br />
			이미지 <input type="file" name="myImg" accept="image/*"/><br />
			<button type="submit">업로드</button>
		</form>
		<img id="image" width="300"/>
	</div>
	<script>
		document.querySelector("#myForm").addEventListener("submit", (event)=>{
			//기본동작(폼제출)을 막기
			event.preventDefault();
			//event.target=>해당 이벤트가 발생한 바로 그 요소의 참조값(즉 여기서는 form의 참조값이 된다)
			//document.querySelector("#myForm")==event.target 동일 값
			const data=new FormData(event.target);
			//fetch 함수를 이용해서 FormData 전송하기
			fetch("${pageContext.request.contextPath}/file/upload3", {
				method:"post",
				body:data
			})//옵션으로 전달하는 키값은 보통 정해져 있다.
			.then(res=>res.json())
			.then(data=>{
				console.log(data);
				//data.saveFileName은 upload 폴더에 저장된 파일명이다.
				const requestPath="${pageContext.request.contextPath}/upload/"+data.saveFileName;
				document.querySelector("#image").setAttribute("src", requestPath);
			});
		});
	</script>
</body>
</html>
글자, svg는 벡터 이미지이다.
<17:30 8교시>
오늘 한 거 복습하기
내일 upload_form4.jsp 기능 만들어보기할 거 미리 해보기
'공부의 기록 > 자바 풀 스택 : 수업내용정리' 카테고리의 다른 글
| 자바 풀 스택 1/14 오후 기록 037-2 (0) | 2025.01.14 |
|---|---|
| 자바 풀 스택 1/14 오전 기록 037-1 (0) | 2025.01.14 |
| 자바 풀 스택 1/13 오전 기록 036-1 (0) | 2025.01.13 |
| 자바 풀 스택 1/10 오후 기록 035-2 (0) | 2025.01.10 |
| 자바 풀 스택 1/10 오전 기록 035-1 (0) | 2025.01.10 |